

FREQUENTLY ASKED QUESTIONS
These are the questions we hear a lot and you'll find the answers below. But if you have others, please don't hesitate to contact us — we're here to help.
1. How do I get started with eCADSTAR?
It’s very easy to get started. eCADSTAR is modular. You can select a Bundle that includes the features you require. Find out more about the eCADSTAR features here. Or you can request a personalized demonstration.
2. How much does eCADSTAR PCB design software costs?
eCADSTAR offer 5 perpetual bundles that offer a tailor-made solution based on your requirements. Check out our Bundles page for more information, you can always evaluate eCADSTAR for FREE click here to request.
3. Is eCADSTAR recommended for beginners?
Yes. eCADSTAR is designed to be intuitive and easy to learn. To support you we have provided an extensive library of training and help resources. Watch the eCADSTAR Interactive Tour trailer here. To download our datasheets please visit PCB Editor, Schematic Editor, and Library Editor pages. We are developing an eCADSTAR Academic Program – get in contact for more details.
4. Can I try eCADSTAR before I purchase the PCB software?
Yes, you can request a 30-day free trial with full features to evaluate the eCADSTAR software. Follow this link and read more about the features included in the ‘Ultimate’ Bundle.
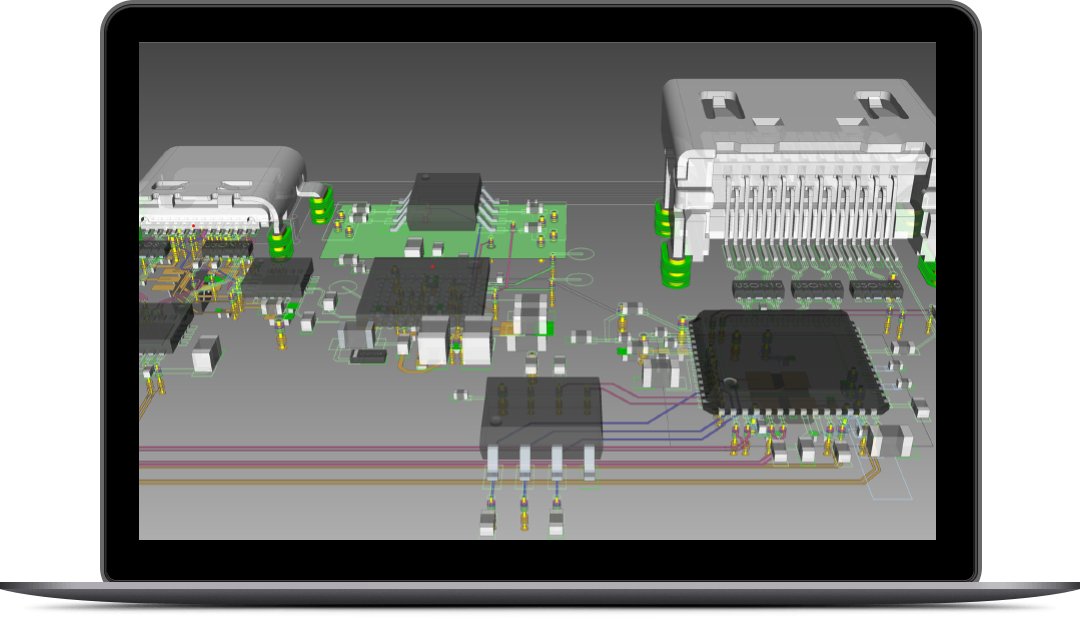
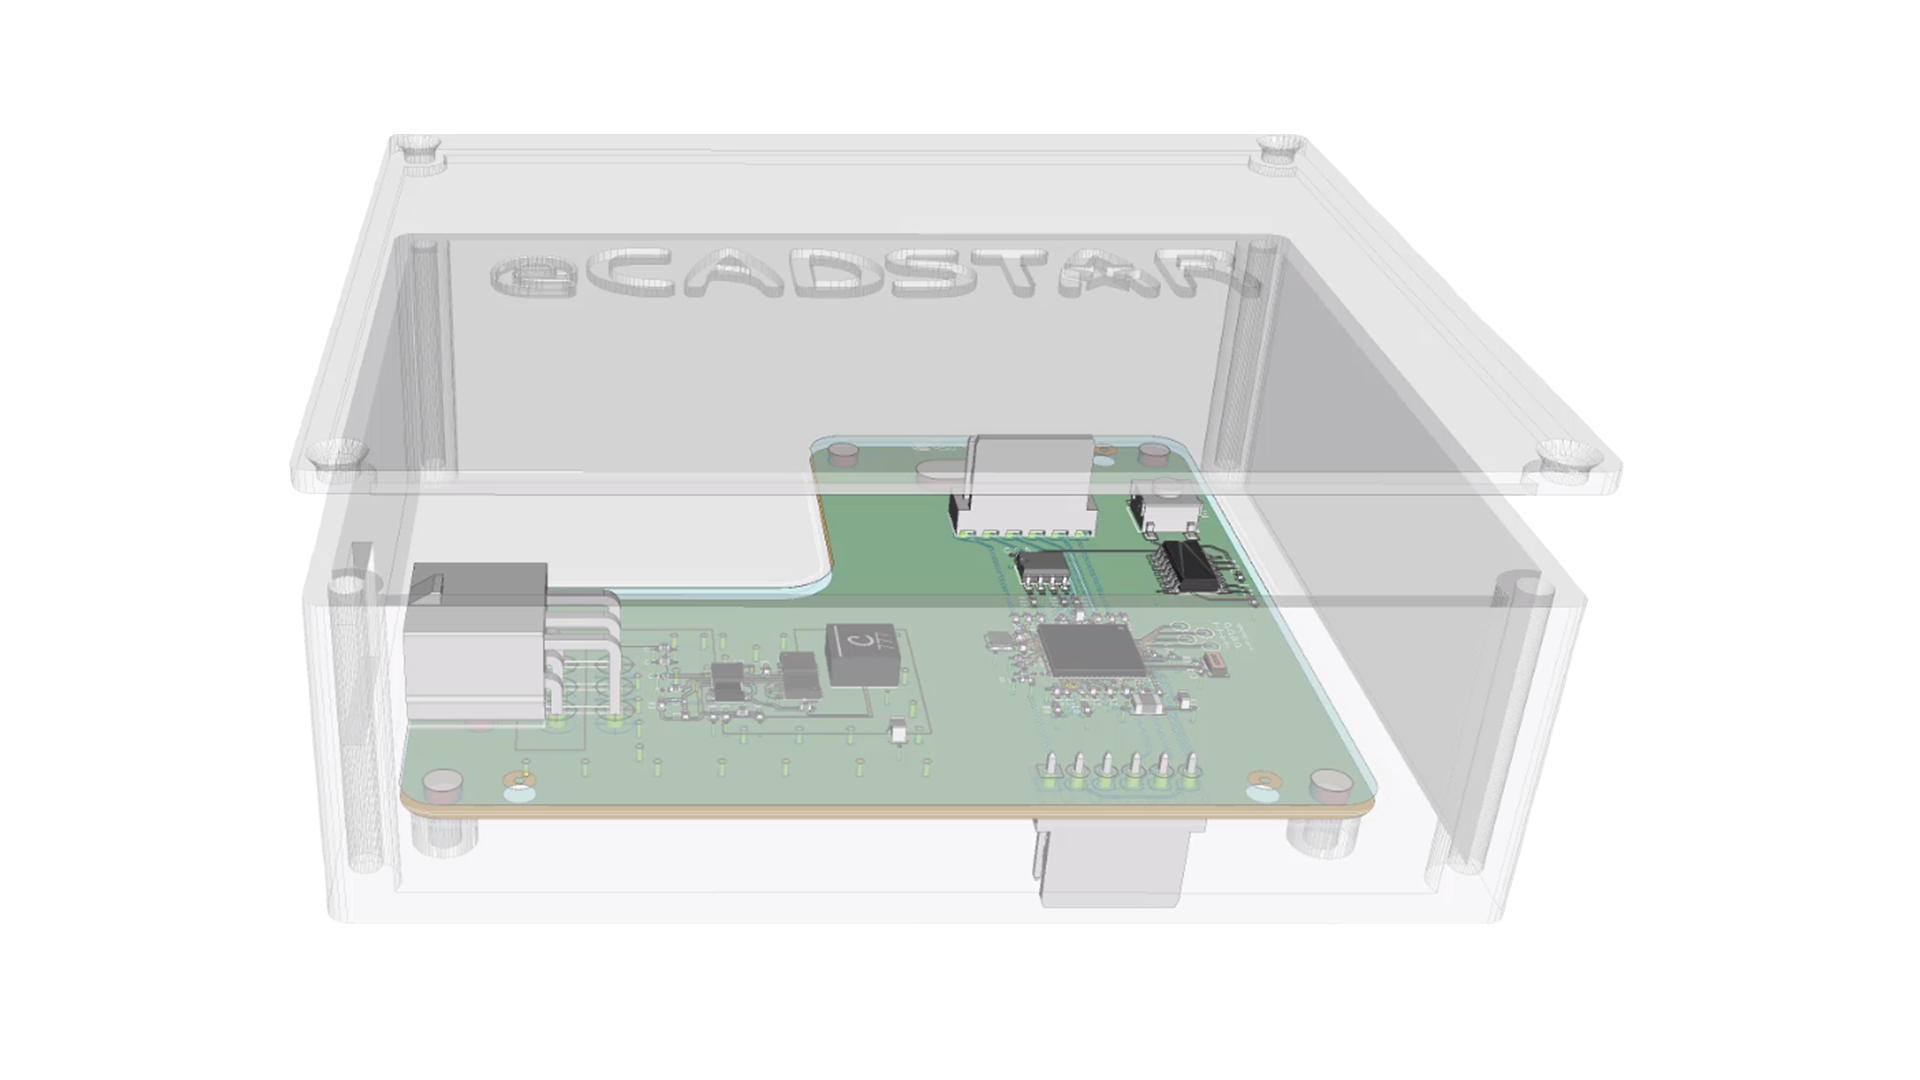
5. Does eCADSTAR have a 3D view?
Yes, in eCADSTAR you can switch instantly between 2D and 3D. Find out more information about 3D views in PCB Editor.
6. Where can I create a technical support case in eCADSTAR?
Our Global Support website (ZGS) is aimed at providing enhanced service to you, our customers. ZGS creates one unified global support site. This site is supported by a global R&D infrastructure to ensure your issues are resolved swiftly and to the best ability of Zuken as a global organization.
eCADSTAR ensures your design is always up to date by identifying library changes, compare part/symbol versions and reload them in situ within your design, using the library reload tool.
The Supported Operating Systems and Hardware requirements are documented in the eCADSTAR Hardware Configuration available on Zuken Global Support.
- The best PCB design software, eCADSTAR has been designed to simplify and improve your design process, with a common and familiar interface across all applications.
- The look feel and interaction of the user interface is common and easily navigated with tabbed window access, dockable panels, ribbon menus, and quick access toolbars – all of which are fully customizable.
- Settings are centralized and simplified to maximize your design time.
- You can set a track width on a net in Schematic Editor and pass this to the PCB Editor using the forward annotation command.
- To set a track width on a net in the Schematic Editor you need to know the Track width stacks that will be available in the target PCB. This can be found in the Design Rule Library or the target PCB design (PCB Editor > File > Open > Design Rule Library > Tracks tab or PCB Editor > Home Ribbon > Design Rules > Rule Editor > Tracks Tab).
- In the Schematic design, select the net to assign the Track Width Stack. In the Properties dialog enter the Track Width Stack name in the Track Width Stack row.
The data resource option allows the user to load a data resource file at the time a new PCB is created. The data resource file pre-populates the application settings for items such as Design Rule check options, Move preferences, Routing option preferences, and other items on design creation. This enables the user to load the preferred setup when starting work.
Data resource files can be exported from PCB using the Data Resource Export tool (PCB Editor > Design Ribbon > Export > Data Resource).
Inner layer mapping for padstacks is required for through-hole mapping where the internal pad size is different to the outer layer pad size, such as suppressed pads when there is no internal routing to the pad.
Component reference designators are displayed in a default position (in the centre of the footprint) in PCB Editor when turned on in the Canvas View Settings dialog (View Ribbon > Information > Canvas View Settings). It is not possible to change the default position of the reference designator either when creating a footprint or within PCB Editor.
There is no ability to define the Reference Designator location when creating a footprint in the Library Editor.
Reference Designators are generated for the footprint in the PCB in the Component Symbol dialog (Draw Ribbon > Text > Component Symbol ). it is possible to define the Reference Designator on individual components using the Input Mode option Reference Point. Multiple Reference designators may be created using the Symbol location option, and then frame selecting the components to create the reference designators for.
You can add a comment to any PCB layer using the Technology Editor in the PCB design or technology library (PCB Editor > Home Ribbon > Design Rules> Technology Editor or PCB Editor > File > Open > Technology Editor).
In the Technology Editor select the Layer Configuration tab. In the Layer comment column add the comment you require for each layer.
To view the comments in your design you need to enable the option to view the layer comments. in the Application Settings dialog (PCB Editor > File > Configuration > Application Settings > Display Settings) change the Layer name Display format to Layer comment. This will make the application display the layer comment with the Layer name.
In the PCB Editor it is possible to export and import filter sets using the Export and Import Data Resource commands (Design Ribbon > Export > Data Resource and Design Ribbon > Import > Data Resource).
Please note, in addition to the filter set the Data Resource file will include all settings from the design, including the current status of the display and command panels.
Some graphics from some download sites do not display correctly in the built-in eCADSTAR web browser after downloading a part ECAD model. This can affect, for example, footprint or 3D part model previews.
If this occurs, then click “Open in Default Browser” on the eCADSTAR application ribbon.
This will open the item in your default browser. If your default browser is one of the most popular, such as Chrome or Firefox, it is likely the display will now be correct.
PURCHASING FAQs
Here are common questions you may have about buying eCADSTAR on a perpetual or subscription-based license
In Zuken terms, a term-based subscription license is also known as a ’term-based’ license (TBL). It permits you to access the software for the duration of your active license.
In Zuken terms, a perpetual license is a type of software license that authorizes an individual to use a program indefinitely
At the end of your subscription, your license will expire and your access to the software will cease.
However, if you were to re-activate your license and buy a new subscription, you will be able to access all of your work again. Nothing is lost.
What are the minimum and maximum terms I can subscribe to a license?
Should you purchase a perpetual license, maintenance, and hotline support are included for the first 12 months and can be renewed thereafter.
Should you purchase a subscription license, maintenance, and hotline support are included during the term of the subscription.
NODE-LOCKED LICENSE
A software licensing model which restricts the operation of the software to a single computer, where the authorization is provided by a license file that is locked to a unique identifier within the computer (e.g. a MAC address).
NETWORK LICENSE
A software licensing model which allows a license server application to issue a defined number of licenses to the customer. The license server application is restricted to running on a single computer through authorization provided by a license file which is locked to a unique identifier within the computer (e.g. a MAC address).
When authorized by the license server application which controls the number of users who may concurrently use the software, the customer may use the software over a local area network (LAN) at the designated site for which an applicable license fee is paid. However, a license for the software may not be shared or used concurrently on different computers. For the avoidance of doubt, the number of persons using the software concurrently must not exceed the number of licenses granted to the customer as indicated in the order confirmation.
If you are running Windows 10, right-click on the Start button and select Command Prompt from the menu.
If you are running Windows 11, right-click on the Start button and select Windows Terminal from the menu. Type in “ipconfig /all” and press Enter.
Your network configurations will display. Scroll down to your network adapter and look for the values next to “Physical Address,” which is your MAC address. Running a different OS, please check the internet on how to find your MAC Address.